Introduction
The ease of take-off and landing of your drone depends on a variety of factors, with many of these factors existing beyond the realm of your control. Whilst it may be possible for you to pick up your drone and relocate to an area with perfectly smooth tarmac on which to land on, it's not a solution that is regularly available, and sometimes you may be required to take off and land in an environment that isn't the most suitable in which to do so. In situations like this, it's possible to use your hands to both safely launch and land your drone, avoiding any obstacles or injury in the process.
In this article, we're going to have a look at how and why you may want to catch your drone on landing, with a look at hand launching in a future article. First off, there are a number of reasons why you may want to hand catch your drone, which could include any (or a combination of) the following:
1. Unsuitable terrain for landing - any rocky or uneven ground could cause damage to the drone propellers or underside of the drone.
2. Dusty or sandy landing areas - whilst these areas might be flat, both take off and landing result in stirring up a huge amount of dust.
3. Small or narrow landing area - for example, flying a drone off the back of a boat, where there is little room for maneuver.
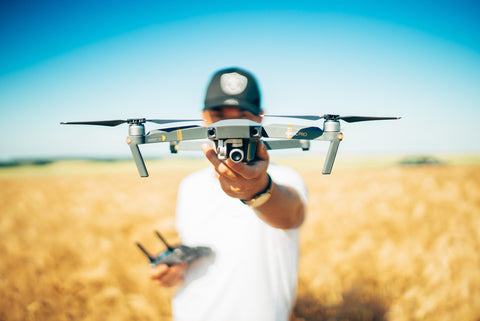
4. Populated areas - we recommend ensuring the take off and landing areas are clear when piloting your drone, but sometimes you may have people walking past or in the vicinity and want to take extra care. Catching the drone at height can avoid injury and damage to the drone.

Photo by David Henrichs on Unsplash
We should mention here that both hand launching and catching your drone does have an element of risk to both you and those around you. Please ensure that you are comfortable piloting your drone before you attempt something like this. Now that that's been said, let's have a look at how to actually catch your drone.
Step 1 - Check your surroundings
It's always preferable to catch your drone in a safe area, ensuring a radius of several feet of clear space between you and any potential obstacles. These obstacles may be any fences or railings, walls, signs or other people. Before you even begin to land your drone, you should check your surroundings to ensure that the area is completely safe. Once the drone has descended to a point where you're almost ready to land, you should let it hover and check around you again.
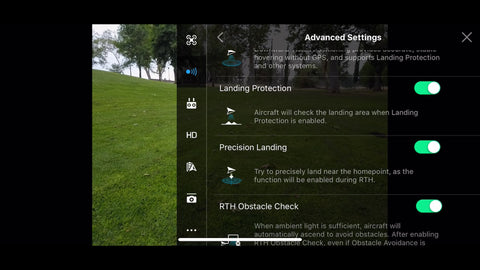
Step 2 - Turn off landing protection
This can be done by going to visual navigation settings in the DJI menu, going to advanced settings, then choosing landing protection. Slide this to off, and click disable. Doing this stops your drone treating your hand as an obstacle when landing and, whilst it's possible to catch your drone with it turned on, it does make it much more difficult. When you need this feature you can turn it on in the same menu.

Step 3 - Check your footing
A really important point that many guides leave out. Although it sort of falls under point one, there is a tendency to check your surroundings without actually looking down at your feet. This is a vital step (both literally and metaphorically), as your focus will be mostly directed up in the air with your eyes watching the drone as it descends. As your drone hovers above you, take a quick glance down at your feet to check for any uneven ground or obstacles that may cause you to stumble as you reach for your drone.
Step 4 - Get ready and reach out
Bring your drone down further until it's hovering above you. At this point you can check surroundings and footing a final time. After you've done that, bring the drone down further till it's within reach, reach out and grab the underside of your drone. Depending on whether you're right-handed or left-handed and which mode you have the drone in, you may feel more comfortable using the opposite hand to catch the drone. Keep your hand on the underside of the drone, with fingers grasping the sides - there should be very little risk of your hands getting caught in the propellers.
Step 5 - Switch the drone off
Using whichever hand isn't on the drone, slide the joystick downwards and towards the center of the controller (depending on which drone you have and mode you're in, for MODE2 it's the left stick that needs to be put into the lower-central mode to turn off the drone.
Step 6 - Relax
Take a deep breath - your drone has returned safely, no one has been injured, and all your fingertips are still attached to your fingers. Pat yourself on the back, pack up and head off.
Mission accomplished! Congratulations on catching your drone safely. If you found this article useful, consider subscribing to our mailing list to get the latest updates, as well as tips and tricks on how to improve your photography and piloting.
Thanks for reading and we'll see you next time.
The Beyond Visuals Team 

